
The Upholstery Insider
The Upholstery Insider by Canvas Guy - is where drivers, businesses, and boat owners in Utah can learn more about upholstery and canvas repair. Explore our guides, see real projects, and discover how to make your interior last longer.
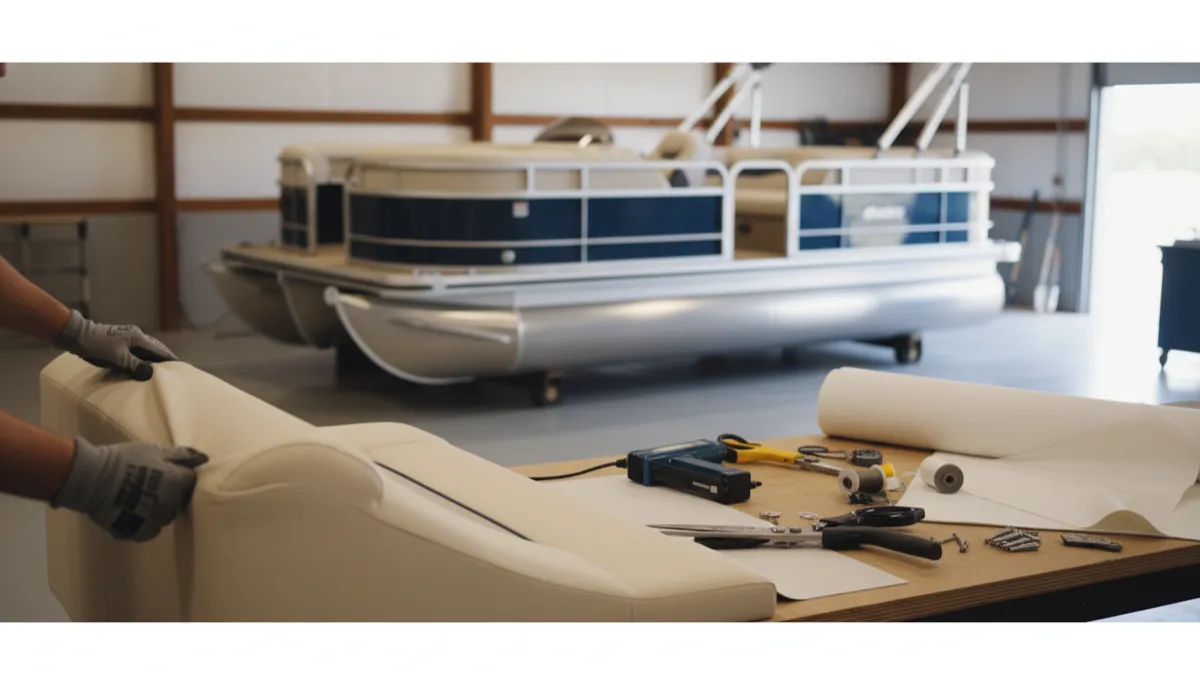
Reupholstering Your Pontoon: A Complete Guide
Boating, Pontoon Reupholstery
What Goes Into Reupholstering a Pontoon Boat?
Reupholstering a pontoon boat is one of the most dramatic ways to refresh its look, comfort, and resale value—but it’s also a bigger project than many owners expect. Whether you plan to hire a professional or tackle some of the work yourself, understanding what actually goes into reupholstering a pontoon will help you budget wisely, set realistic expectations, and end up with a result you’re proud of for years to come.
Why Pontoon Reupholstery Is More Than Just New Seat Covers
On the surface, reupholstering sounds simple: remove the old material, staple on the new, and enjoy fresh seats. In reality, a proper reupholstery job touches almost every soft surface on your pontoon and often reveals hidden issues below the fabric. It involves planning, structural inspection, materials selection, careful disassembly, pattern-making, sewing, installation, and finishing details. Each step affects how long your new interior will last in harsh marine conditions—sun, water, temperature swings, and constant use.
Step 1: Assessing Your Pontoon’s Current Interior
Before anyone orders material or grabs a staple gun, the first step is a thorough assessment of your pontoon’s interior. This is where you—or a professional upholsterer—decide whether you need a light refresh or a near-complete rebuild of the seating and panels.
Visual inspection of vinyl: Look for cracks, stiffness, fading, mold spots, and seams that are pulling apart. If the vinyl is brittle or heavily sunburned, replacement is usually the only realistic option.
Checking the foam: Sit on each cushion. If you sink too far, feel hard spots, or notice permanent dents, the foam may be degraded or waterlogged and will need at least partial replacement.
Examining the seat bases and frames: Many pontoon seats are built on wood bases that can rot or delaminate. Aluminum frames can corrode at fastener points. These issues must be addressed before new upholstery goes on, or your investment won’t last.
This assessment phase is also when you decide how far you want to go: only the most damaged cushions, all seating, or a full interior refresh including side panels, sundecks, and captain’s chair.
💡 Pro Tip: Take detailed photos and measurements of every seat and panel before anything is removed. They’re invaluable references later for patterning and reassembly.
Step 2: Planning the Design, Colors, and Layout
Once you know what needs to be replaced, the fun part begins: planning how you want your “new” pontoon to look and feel. Reupholstery is your chance to modernize the boat and tailor it to how you actually use it.
Color scheme: Many owners choose neutral tones like beige, light gray, or cream for the main areas, then add darker accents or piping. Neutrals stay cooler in the sun, are easier to match if you add pieces later, and appeal to future buyers if you ever sell the boat.
Style and stitching: You can keep the factory look or upgrade to more contemporary designs—think double-stitched seams, quilted inserts, or subtle contrasting panels. These details don’t just look good; they also affect how the vinyl stretches and wears over time.
Functionality: Consider how you use your pontoon. Do you want extra cupholders, storage pockets, or reinforced areas where people often step on cushions? Planning these now is far easier than modifying things later.
Good upholsterers will often sketch out the layout or show you sample photos so you can visualize the final result. For DIYers, browsing photos of newer pontoons can provide inspiration while keeping you within practical design limits.
Step 3: Choosing Marine-Grade Materials That Last
One of the biggest differences between a quick-and-dirty re-cover job and a professional-grade reupholstery is the quality of materials. A pontoon’s interior lives in a punishing environment, so using the right products is non-negotiable if you want your seats to look good beyond a season or two.
Marine Vinyl vs. Regular Upholstery Vinyl
UV resistance: Marine vinyl is engineered to resist fading and cracking from intense sunlight. Regular indoor vinyl can look fine at first but quickly becomes brittle and discolored on the water.
Mold and mildew protection: Quality marine vinyl includes treatments that help resist mold, mildew, and pink staining from bacteria—common issues in damp, humid environments.
Cleanability: Marine vinyl is designed to handle repeated cleaning with mild soaps and marine-safe cleaners without breaking down as quickly.
Foam, Backing, and Thread
Foam: High-density, marine-grade foam holds its shape longer and resists soaking up water. In some cases, multiple layers of foam with different firmness levels are used to balance comfort and support.
Backing materials: Scrim foam or Dacron wrap is often added under the vinyl to soften edges and give cushions a fuller, smoother appearance. It also helps reduce friction between the vinyl and foam.
Thread: UV-resistant polyester or PTFE (Teflon) thread is crucial. Regular thread can rot or weaken quickly outdoors, leading to seam failures even if the vinyl itself still looks good.
📌 Key Takeaway: Cutting corners on materials might save money upfront but usually means redoing the job much sooner. Marine-grade vinyl, foam, and thread are worth the investment.
Step 4: Disassembly – Removing Old Seats, Panels, and Hardware
With a plan and materials in place, the physical work begins. Reupholstering a pontoon starts with carefully removing the existing seating and panels from the deck. This can be more time-consuming than it looks, especially on older boats where fasteners have corroded or been painted over.
Seats and backrests are unbolted from the deck and separated into manageable pieces. Hinges, cupholders, and hardware are removed and labeled so they can go back exactly where they came from.
Side panels, helm panels, and sundeck lids are taken off so they can be re-covered on a workbench rather than on the boat, which allows for much cleaner and tighter results.
As the old upholstery is peeled back, it often reveals hidden problems: rotted wood, rusted staples, or foam that has been quietly soaking up water for years. Addressing these now is part of what truly goes into reupholstering a pontoon boat, even if it wasn’t obvious from the start.
Step 5: Repairing or Rebuilding the Seat Bases and Structure
New vinyl over a weak or rotted base is like new paint on a rusty car—it might look good briefly, but it won’t last. That’s why structural repair is a core part of a proper reupholstery job, especially on older pontoons.
Wood bases: Soft spots, dark staining, or flaking layers are signs of water damage. Damaged sections may be cut out and replaced, or entire bases rebuilt using marine-grade plywood, composite panels, or plastic seat bases depending on your budget and goals.
Aluminum frames: Corrosion around fasteners may require cleaning, rust treatment, or replacement hardware. Any sharp edges are smoothed to prevent them from cutting into new foam or vinyl.
This is also the moment to reinforce high-stress areas—like the corners of sundecks people sit or stand on frequently—so your new upholstery isn’t stressed by flexing or loose joints underneath.
Step 6: Replacing Foam and Padding Where Needed
Not every cushion needs brand new foam, but many older pontoons benefit from at least partial replacement. Foam that has absorbed water can add surprising weight to the boat, smell musty, and break down faster under the new vinyl.
Waterlogged foam is usually discarded and replaced with marine foam of similar thickness and firmness. In some cases, a slightly firmer foam is chosen to improve support and help the seats keep their shape longer.
If the foam is structurally sound but a bit worn, a new layer of softer foam or Dacron wrap can be added on top to restore a plush feel without the cost of a full replacement.
Properly shaped foam is essential. Corners are rounded, edges are beveled, and surfaces are smoothed to avoid sharp transitions that can stress the vinyl and lead to premature cracking or visible lumps.
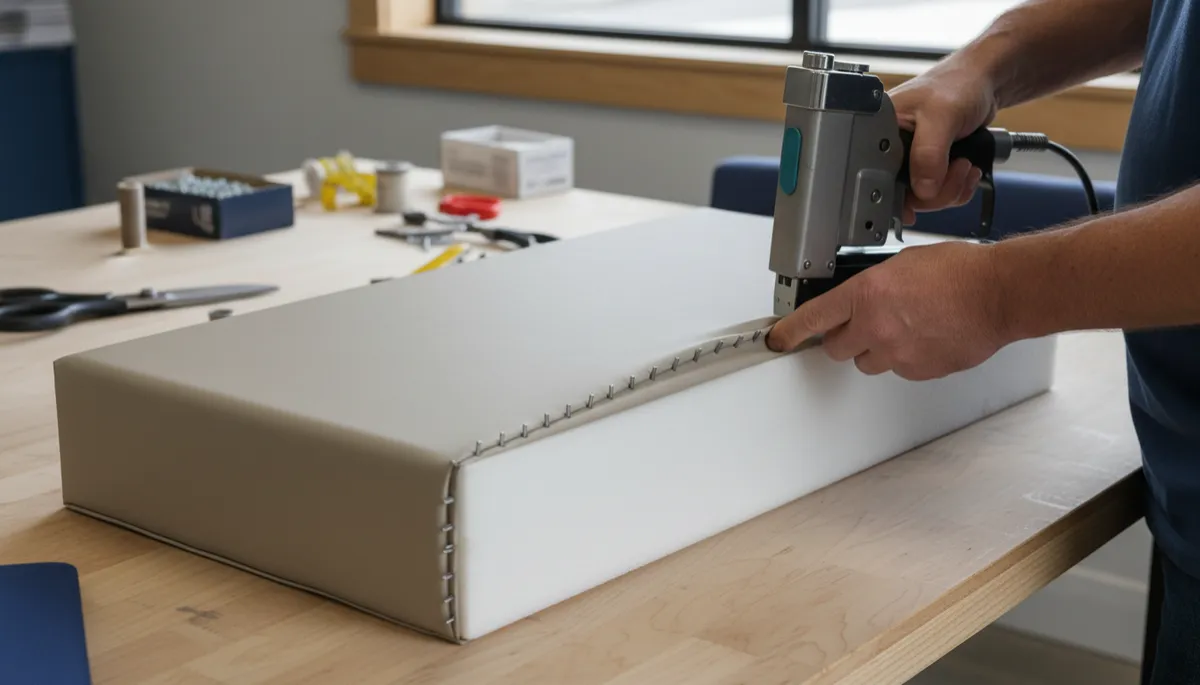
Close-up of a marine upholsterer’s hands stretching -tone marine vinyl over fresh foam on a...
Careful foam shaping and vinyl tension are key to smooth, long-lasting pontoon seats.
Step 7: Patterning, Cutting, and Sewing the New Covers
One of the most technical parts of reupholstering a pontoon boat is creating the new seat covers. This is where experience really shows, whether you’re a seasoned DIYer with a heavy-duty sewing machine or a professional marine upholsterer.
Old covers are carefully removed and used as templates, or new patterns are made directly from the foam and bases. Each panel is labeled to avoid confusion later.
Panels are cut from the marine vinyl with allowances for seams and stretching. Direction of grain and any texture are considered so the finished seats look consistent across the boat.
Stitching is done with heavy-duty, UV-resistant thread. Corners, curves, and decorative accents require careful sewing so they fit tightly over the foam without wrinkles or loose spots.
For multi-tone designs, separate pieces of vinyl are sewn together to create stripes, insets, or piping. These decorative seams must be just as strong and weather-resistant as the structural seams, so they’re reinforced where necessary.
Step 8: Installing and Stretching the New Upholstery
With new covers sewn, the next stage is fitting them over the foam and bases, then securing them tightly. This is where the project starts to look like a finished pontoon again—but it’s also where patience matters most.
Covers are slipped over the foam and base, then gradually stretched and stapled from the center outward. Working evenly around the cushion helps avoid wrinkles and uneven tension.
Heat guns or warm environments can help the vinyl become more pliable, making it easier to pull tight around corners and curves without creasing.
Excess material is trimmed neatly on the underside, and staples are checked to ensure there are no sharp points that could cut through the vinyl or scratch passengers.
Side panels, helm pads, and sundeck lids are treated similarly, with careful attention to corners and any cutouts for speakers, hinges, or hardware so everything lines up during reinstallation.
Step 9: Reinstalling Seats, Panels, and Hardware on the Pontoon
When all the cushions and panels are re-covered, they’re ready to go back onto the boat. This is the moment you finally see the full transformation—and where careful organization during disassembly pays off.
Seat bases are re-bolted to the deck, often with new stainless hardware to resist future corrosion. Any holes in the deck are sealed to reduce the chance of water intrusion into the subfloor.
Hinges, latches, cupholders, and speaker grilles are reinstalled. This is also a good time to upgrade worn hardware or add small conveniences, like extra cupholders or USB charging ports, if your layout allows.
Finally, everything is checked for secure mounting and smooth operation. Lids should open and close without binding, and seats should feel solid when you sit or lean on them. A quick overall clean of the deck and rails completes the refreshed look.
Time, Cost, and DIY vs. Professional Considerations
Understanding what goes into reupholstering a pontoon boat also means understanding the time and cost involved. The scope of work can vary widely—from a few cushions to a full interior overhaul—so there’s no single price tag or timeline that fits every project.
Typical Time Frame
A professional shop might need anywhere from a few days to a couple of weeks, depending on how busy they are, how extensive the repairs are, and whether parts or materials need to be ordered.
A DIY project, especially for a first-timer, can stretch into several weekends. Much of that time goes into careful disassembly, patterning, and learning to handle the vinyl and sewing machine.
Cost Factors
Size and layout of the pontoon (more seating equals more material and labor).
Quality of materials selected (standard vs. premium marine vinyl, basic vs. high-end foam, simple vs. complex stitching).
Amount of structural repair needed for seat bases and frames.
DIY can reduce labor costs but adds the expense of tools—like a heavy-duty sewing machine, marine staples, and specialty needles—and the learning curve. Hiring a professional increases upfront cost but typically delivers a more polished, long-lasting result with a warranty on workmanship.
⚠️ Warning: If your pontoon has significant rot in the deck or seat bases, address those structural issues before or during reupholstery. Ignoring them can shorten the life of your new interior and compromise safety.
Step 10: Protecting Your Investment After Reupholstery
After you’ve invested the time and money to reupholster your pontoon, a bit of regular care will dramatically extend the life of your new interior. Maintenance is part of the overall reupholstery process, even though it happens after the work is “done.”
Use a quality pontoon boat cover whenever the boat is not in use to protect the vinyl from constant sun exposure, bird droppings, and debris.
Clean spills and sunscreen residue promptly with mild, vinyl-safe cleaners. Avoid harsh solvents or abrasive scrubbers that can strip protective coatings and dry out the material.
Allow cushions to dry thoroughly if they get wet. Standing water and trapped moisture are the enemies of both vinyl and foam.
A simple seasonal routine—cleaning, inspection, and quick touch-ups—will help ensure that the effort you put into reupholstering pays off with years of comfortable, attractive boating.
Bringing It All Together: What Really Goes Into Reupholstering a Pontoon Boat
When you add it all up, reupholstering a pontoon boat is far more than a cosmetic makeover. It’s a multi-step process that combines design decisions, structural repairs, careful material selection, and skilled hands-on work. From assessing worn vinyl and waterlogged foam, to rebuilding seat bases, to patterning and sewing new covers, to reinstalling everything on the deck, each stage plays a role in how your refreshed pontoon will look, feel, and hold up on the water.
For some owners, the project is a satisfying DIY challenge that transforms an aging family boat into something that feels almost new again. For others, partnering with a professional marine upholsterer is the best way to get a factory-quality finish and peace of mind. Either way, understanding what goes into reupholstering a pontoon boat helps you plan your budget, set your timeline, and make smart choices about materials and design.
If your pontoon’s seats are cracked, faded, or simply past their prime, a thoughtful reupholstery job can completely change how it feels to step onboard. With the right approach, you’re not just replacing vinyl—you’re investing in more comfortable outings, a cleaner and more inviting space for friends and family, and a boat that you’ll be proud to dock for many seasons to come.

Our Customers Say It Best
"We had a ripped boat cover that we thought was beyond repair. Now it’s strong, stylish, and holding up perfectly to the elements."

“My truck’s driver seat was cracked and falling apart. After Canvas Guy worked on it, it looks better than when it was new. The difference is night and day.”

“The only upholstery shop I recommend. Honest pricing, excellent work.”

“Finally, an upholstery shop that does it right the first time. Strong stitching, durable material, and quick turnaround.”

“I was restoring my classic car and needed the seats to match the original look. Canvas Guy nailed every detail.”

“We ride ATVs hard, and the seats take a beating. Canvas Guy’s work holds up better than anything I’ve tried before.”

Your Project Deserves This Level of Quality
Get In Touch
Email: [email protected]
Address
259 S Center St.
Elsinore, UT 84724
Phone Number:
(928) 925-8258


Copyright © 2026,all right reserved