
The Upholstery Insider
The Upholstery Insider by Canvas Guy - is where drivers, businesses, and boat owners in Utah can learn more about upholstery and canvas repair. Explore our guides, see real projects, and discover how to make your interior last longer.
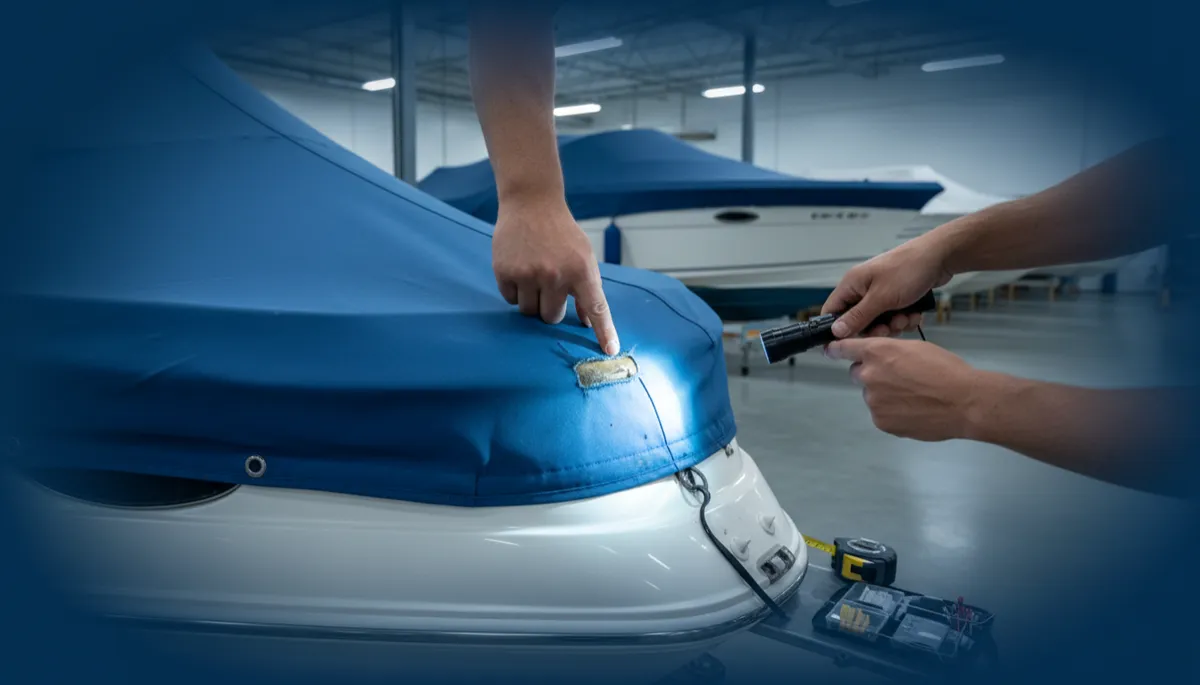
Inspect Your Boat Cover Before Winter Storage
Boating, Winter Storage, Boat Covers
What to Look for When Inspecting Your Boat Cover Before Winter Storage
A thorough boat cover inspection before winter storage can be the difference between uncovering a clean, dry boat in spring and discovering mold, stains, or costly damage. Here’s a step‑by‑step guide to what you should check before the cold weather sets in.
Why a Pre‑Winter Boat Cover Inspection Matters
Your boat cover is the first and often only line of defense between your boat and months of harsh winter conditions. Snow, ice, wind, UV rays, and moisture can all find their way into the smallest weaknesses in a cover. If those weaknesses go unnoticed now, they can turn into big problems by spring.
A careful inspection helps you:
Catch small rips, worn stitching, or failing straps before they grow under the weight of snow and ice
Prevent water intrusion that leads to mold, mildew, and interior damage
Avoid rodents and insects sneaking in through gaps or loose areas of the cover
Extend the life of your cover and protect your investment in the boat itself
💡 Pro Tip: Set aside at least 30–45 minutes for a full inspection on a dry, calm day. Rushing through this step is one of the most common reasons covers fail mid‑winter.
Step 1: Clean the Cover Before You Inspect
Dirt, salt, leaves, and grime can hide damage and weaken the fabric over time. Before you start looking for problems, give the cover a basic cleaning so you can clearly see what you’re working with. Lay the cover out flat on a clean surface like a driveway, lawn, or dock, and brush off loose debris with a soft broom or brush. Avoid harsh scrubbing that might damage coatings or fibers.
If the cover is heavily soiled, follow the manufacturer’s cleaning instructions. Many fabric covers can be washed with mild soap and water, then thoroughly rinsed. Vinyl covers may need specific cleaners to avoid drying or cracking. The key is to let the cover dry completely before moving on—trapped moisture is a recipe for mold once the boat is wrapped up for winter.
Step 2: Inspect the Fabric or Material for Wear and Damage
Once the cover is clean and dry, start with the main body of the material. This is where you’ll spot the most obvious threats to your boat’s protection. Work methodically from one end to the other so you don’t miss anything.
Look for Tears, Holes, and Thin Spots
Hold sections of the cover up to the light and check for:
Visible rips or cuts from sharp hardware, branches, or trailering
Pinholes or small punctures that may leak under melting snow or rain
Areas that feel noticeably thinner or “papery” compared to the rest of the fabric
Pay special attention to spots that rest on sharp corners, cleats, or windshields—these are common wear points. Even small flaws can grow quickly when snow and ice weigh down the cover, so mark any areas that need patching or reinforcement.
Check for UV Damage, Fading, and Stiffness
Sun exposure slowly breaks down both fabric and vinyl. Even if your cover doesn’t have obvious rips, UV damage can mean it’s near the end of its life. Look for:
Severe fading or chalky surfaces, especially on the top panels that see the most sun
Brittle or stiff sections that crack when you fold or bend them gently
Peeling or flaking coatings on waterproof or treated fabrics
If large areas of the cover show these signs, patching may only be a short‑term fix. It might be time to budget for a replacement cover before next winter, even if you can get one more season out of it with careful reinforcement this year.
Watch for Mold, Mildew, and Staining
Dark spots, musty odors, or slimy patches on the underside of the cover are signs that moisture has been trapped in the past. While some staining is cosmetic, active mold and mildew can spread to your boat’s upholstery and carpet over winter. Treat these areas with a cleaner approved for your cover material, and make sure the fabric is fully dry before storage.
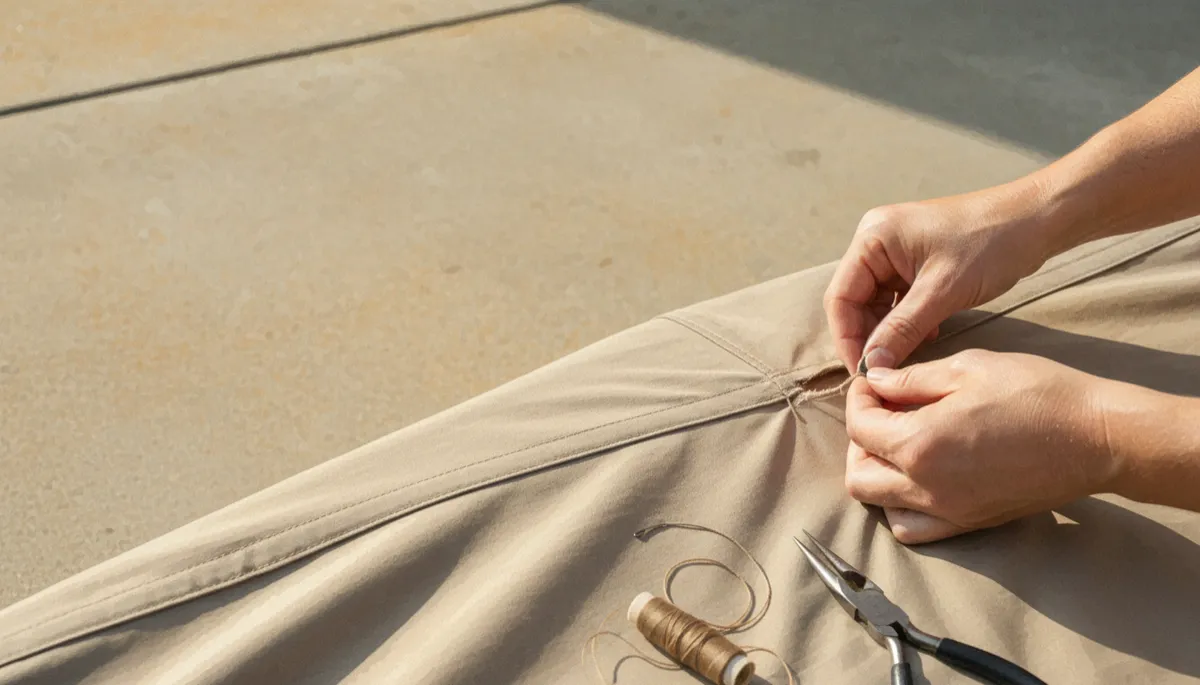
Catching small tears and loose stitching now prevents costly winter water damage.
Step 3: Examine Seams, Stitching, and Reinforcements
Seams and reinforced panels are the backbone of your cover’s strength. These areas take the stress of wind, tension from straps, and the weight of snow. A seam that looks “okay” now can split wide open in a January storm if it’s already weakened.
Inspect All Seams for Gaps and Fraying
Run your fingers along each major seam, especially around the perimeter, over the windshield area, and where the cover curves around the bow and transom. Look for:
Loose or missing stitches where the thread has broken or pulled out
Gaps between panels that open when you apply gentle tension by hand
Frayed edges that could unravel further under stress
Any seam that looks questionable should be repaired before winter. Many local canvas shops can restitch or reseam high‑stress areas for far less than the cost of a new cover, and DIY repair kits can work for small sections if you’re comfortable sewing heavy fabric.
Check Reinforced Areas and Patches
Many covers include extra layers where the fabric contacts cleats, railings, or sharp hardware. These reinforcements are designed to take abuse, but they can fail over time. Make sure:
Reinforcement patches are still firmly attached with no peeling or lifting edges
The underlying fabric isn’t worn through beneath the patch or padding
Any old repair patches from previous seasons are holding and haven’t cracked or curled
📌 Key Takeaway: Seams rarely fail all at once. Early signs like loose threads or slight gaps are your warning to act before winter storms hit.
Step 4: Inspect Straps, Tie‑Downs, and Attachment Points
A perfect cover won’t protect your boat if it can’t stay in place. Wind can turn a poorly secured cover into a sail, tearing fabric and exposing your boat to the elements. Spend extra time checking every strap and attachment point before winter storage.
Examine Straps and Webbing for Strength
Look over each strap, including those that go under the hull, attach to the trailer, or cinch around the perimeter of the boat. Watch for:
Frayed edges or thinning where the strap passes through buckles or rubs on the trailer frame
Stiff, brittle webbing that cracks when bent or twisted gently by hand
Stretched‑out straps that no longer tighten securely
Replace any suspect straps before winter. It’s far cheaper to swap in new webbing or tie‑downs now than to deal with a cover that blows loose in a storm and flaps itself to pieces against your hull.
Check Buckles, Clips, and Grommets
Hardware failure is another common weak point. Go around the cover and inspect every buckle and grommet. Make sure:
Plastic buckles aren’t cracked, UV‑faded, or loose on their straps
Metal buckles and D‑rings aren’t badly corroded or bent out of shape
Grommets are firmly crimped, with no tearing or stretching of the surrounding fabric
If a grommet is pulling out, reinforce that area with a patch before installing a new one. Loose hardware can quickly rip a larger hole when the cover is under wind load or when snow piles up.
Step 5: Confirm Proper Fit and Coverage on the Boat
An inspection isn’t complete until you’ve actually put the cover on the boat and checked how it fits. Even if you’ve used the same cover for years, changes to your boat’s setup—or gradual stretching and shrinkage—can affect coverage and tension points.
Look for Gaps, Low Spots, and Contact Points
With the cover fully installed:
Walk around the boat and check for gaps at the bow, transom, and around the motor or outdrive where wind or animals could get in
Identify any low spots where snow or water could pool instead of shedding off the cover’s surface
Note sharp contact points where the cover rubs on windshields, railings, or cleats
Pooling water and snow add tremendous weight, stretching fabric and straining seams. If you see sagging areas, consider adding support poles or adjusting your existing support system so the cover forms a tent‑like shape that sheds precipitation easily.
Test Tension and Security
After you’ve tightened all straps and tie‑downs, give the cover a firm tug in several directions. It should feel snug but not overstretched. If you can easily lift the hem and see large gaps, adjust your tie‑down pattern or add additional lines where possible. Remember, a loose cover flaps in the wind and causes more wear than one that is properly tensioned.
💡 Pro Tip: Take a few photos of your boat once the cover is installed correctly for winter. Next year, you can reference them to quickly recreate the same secure setup.
Step 6: Check Ventilation and Moisture Control Features
Winter is hard on boats not just because of cold, but because of condensation. Temperature swings can cause moisture to form under the cover, creating a perfect environment for mold, mildew, and corrosion. Proper ventilation helps reduce this risk significantly.
Inspect Built‑In Vents and Openings
Many modern covers have integrated vents or mesh panels. Make sure:
Vents are clear of debris and not blocked by leaves, covers, or accessories underneath
Mesh areas are not torn or pulling away from the main fabric
Any zippered openings close securely without gaps when you’re done preparing for storage
Plan for Moisture Absorption Inside the Boat
While not technically part of the cover inspection, this is the perfect time to place moisture‑absorbing products—like desiccant tubs or marine‑grade dehumidifier bags—inside the boat. They work together with a well‑ventilated cover to keep the interior dry over the winter months.
Step 7: Decide Between Repair and Replacement
After going through all these checks, you may find only minor issues—or you may realize your cover is nearing the end of its useful life. The decision to repair or replace comes down to the extent of the damage, the age of the cover, and your local winter conditions.
When Repairs Make Sense
Consider repairing the cover if:
Damage is limited to small tears, localized seam issues, or a few worn straps
The fabric still feels strong and flexible overall, without widespread UV brittleness
You can have repairs done professionally or with a quality DIY kit well before the first freeze
A good repair can easily extend a cover’s life by several seasons, especially if you continue to inspect and maintain it each fall.
When It’s Time to Replace Your Boat Cover
Replacement is usually the smarter choice when:
The cover has multiple large tears or many areas of thinning fabric
You see widespread UV damage, stiffness, or cracking across large sections
Seams, straps, and reinforcements are failing in multiple places at once
In harsh winter climates, a tired cover can cost you far more in interior damage, gelcoat issues, or even structural problems than the price of a new one. If you’re on the fence, consider how exposed your storage location is to wind, snow, and ice. The more severe the conditions, the more important a strong, reliable cover becomes.
Step 8: Final Preparation Before Long‑Term Storage
Once your cover passes inspection—and any necessary repairs are completed—it deserves a proper final setup for winter. A few extra minutes now can save you hours of cleanup and frustration in the spring.
Remove or lower anything sharp or protruding on the boat that could rub against the cover, or pad it with foam or old towels
Install support poles or a frame to create a peak that sheds snow and rain instead of allowing it to pool
Double‑check all tie‑downs and straps after a day or two, as fabric can relax slightly once it’s been under tension
If your boat will be stored outside, consider visiting it a few times throughout the winter—especially after heavy storms—to brush off snow, look for sagging areas, and make sure the cover is still secure.
Bringing It All Together: A Simple Pre‑Winter Checklist
To make your inspection easy to repeat each year, think in terms of a quick checklist you can follow:
Clean the cover and let it dry completely.
Inspect fabric or vinyl for tears, thin spots, UV damage, and mold.
Check seams, stitching, and reinforcements for gaps or fraying.
Examine all straps, buckles, and grommets; replace any weak components.
Install the cover and confirm proper fit, coverage, and tension.
Verify ventilation and add moisture‑absorbing products inside the boat.
Decide whether repairs are sufficient or if a replacement is needed.
Conclusion: Protect Your Boat Now, Enjoy It Later
Inspecting your boat cover before winter storage isn’t the most glamorous part of boating, but it is one of the most important. A careful, step‑by‑step look at the fabric, seams, straps, and overall fit can prevent a long list of headaches—from moldy cushions and stained carpets to cracked gelcoat and ruined electronics. In many cases, the issues you find will be simple to fix if you address them early.
Think of your cover as inexpensive insurance for everything underneath it. By giving it the same attention you give your engine winterization or fuel system prep, you’re protecting your time, your money, and your enjoyment next season. When spring finally arrives and you peel back a clean, dry cover to reveal a boat that’s ready to go, you’ll be glad you took the extra time to inspect it properly before winter set in.

Our Customers Say It Best
"We had a ripped boat cover that we thought was beyond repair. Now it’s strong, stylish, and holding up perfectly to the elements."

“My truck’s driver seat was cracked and falling apart. After Canvas Guy worked on it, it looks better than when it was new. The difference is night and day.”

“The only upholstery shop I recommend. Honest pricing, excellent work.”

“Finally, an upholstery shop that does it right the first time. Strong stitching, durable material, and quick turnaround.”

“I was restoring my classic car and needed the seats to match the original look. Canvas Guy nailed every detail.”

“We ride ATVs hard, and the seats take a beating. Canvas Guy’s work holds up better than anything I’ve tried before.”

Your Project Deserves This Level of Quality
Get In Touch
Email: [email protected]
Address
259 S Center St.
Elsinore, UT 84724
Phone Number:
(928) 925-8258


Copyright © 2026,all right reserved